Use Etherscan to help you understand NFT projects
原文标题:《 怎么通过看懂 Etherscan 了解 NFT 项目情况? 》
Do you understand the world a little better today
This article is from wechat official account:Did you understand the world a little better today
Understanding Etherscan is essential to becoming a blockchain veteran.
The Etherscan blockchain browser contains all the public blockchain data -- transactions, blocks, wallet addresses, smart contracts -- so you can see who did what and when.
Today we take Doodles as an example to guide you through the whole process of analyzing Doodles data.
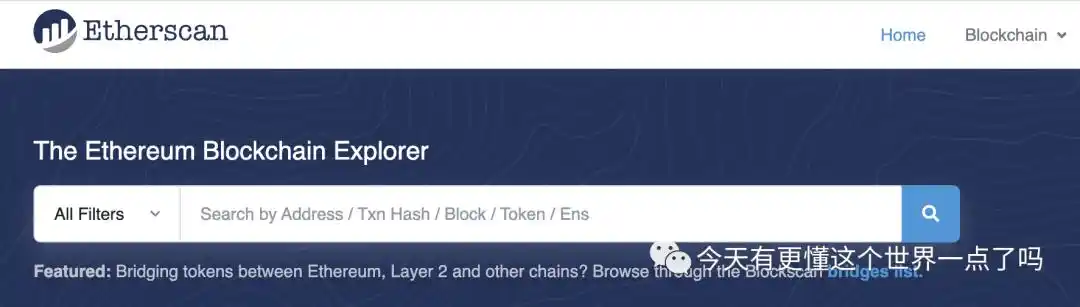
You can search the Etherscan website by typing your address into the box.
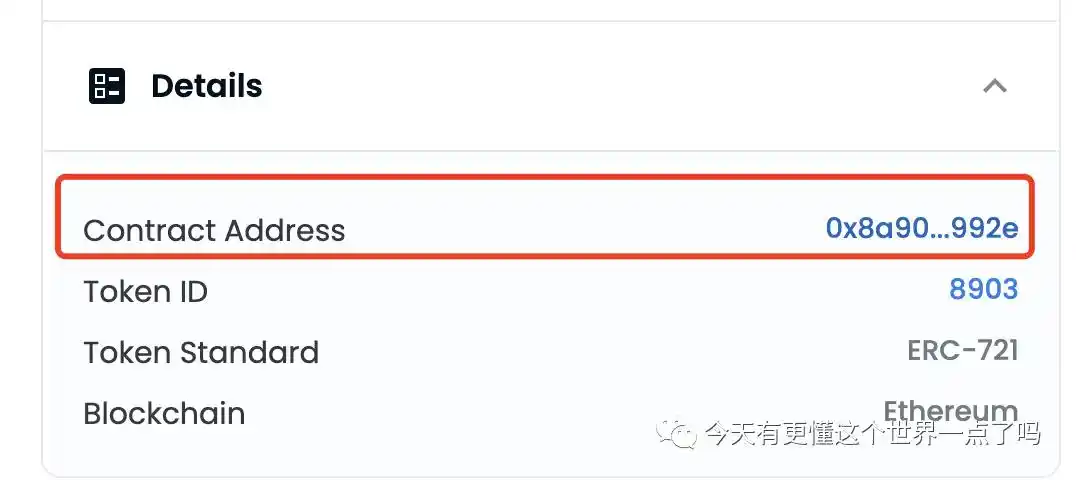
If you know the address of Doodles, you can paste it in directly. If you don't know, you can open Opensea to access a specific NFT home page of Doodles. Click contract Address in the details on the left to jump to the Etherscan details page.
The details page is shown below. Generally, you only need to pay attention to the contract balance, the contract interaction record and the contract code to get most of the information about the project.
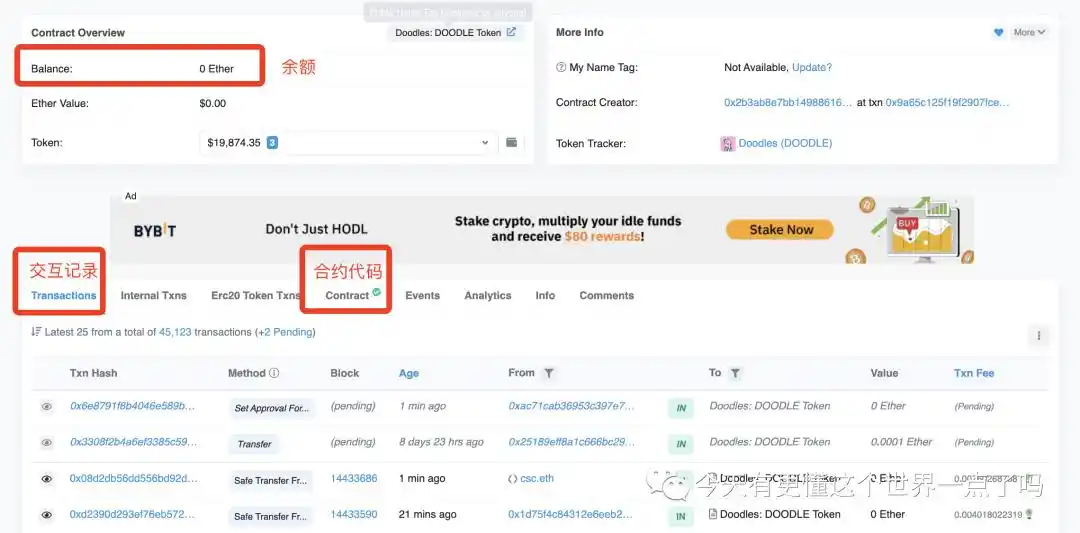
Balance represents the amount of ETH stored at this address. When we were in mint for a CERTAIN NFT project, we actually paid the fee to the NFT contract address first, and then the project party made a one-step withdrawal to transfer ETH to his personal address. Through this, you can know how much money the project party earned. Whether a withdrawal has been made.
Transactions stores the records of all transactions between this address and the smart contract from its birth to the present. You can know what operations are performed by the project side and the user at what time.
If the project party makes the contract open source, you can check the code of the smart contract in the Contract, and you can read and write the smart contract. The writing operation requires owner permission.
Transactions = transactions; transactions = transactions;
Txn Hash: Transaction Hash, unique identifier for this transaction
Method: Indicates the action to execute the trade
Block: Block to which the current transaction belongs
Age: transaction time
From: account that initiates the transaction
To: the account that receives transactions
Value: ETH in the transaction
Txn fee: Gas fee used in transactions
Let's start with the most recent transaction at the top. It performs the SafeTransferFrom action, which means the holder transfers his NFT to another person. The transaction has been packaged into block 11434814 and was made 50 minutes ago. The address of the transaction originator is 0x002... ETH is not included in this transaction, and the gas fee is 0.0015.

Now that you've read what a single line of trade is saying, but that's not enough, let's click Txn Hash to drill down to the transaction details.
After entering the new page, the valuable information you need to pay attention to is Transaction Action. The sentence on the right says "a DoodlesNFT with tokenId 108 was transferred from 0x002... to 0x271..." So now you know exactly who transferred which NFT to whom and when in this transaction.

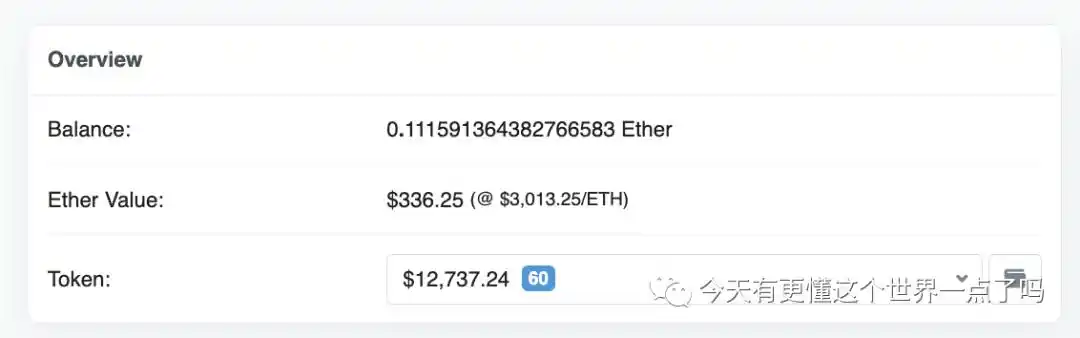
Then we click the initiator's address and drill down to its details page. It can be seen that his balance is 0.1 ETH, small household.
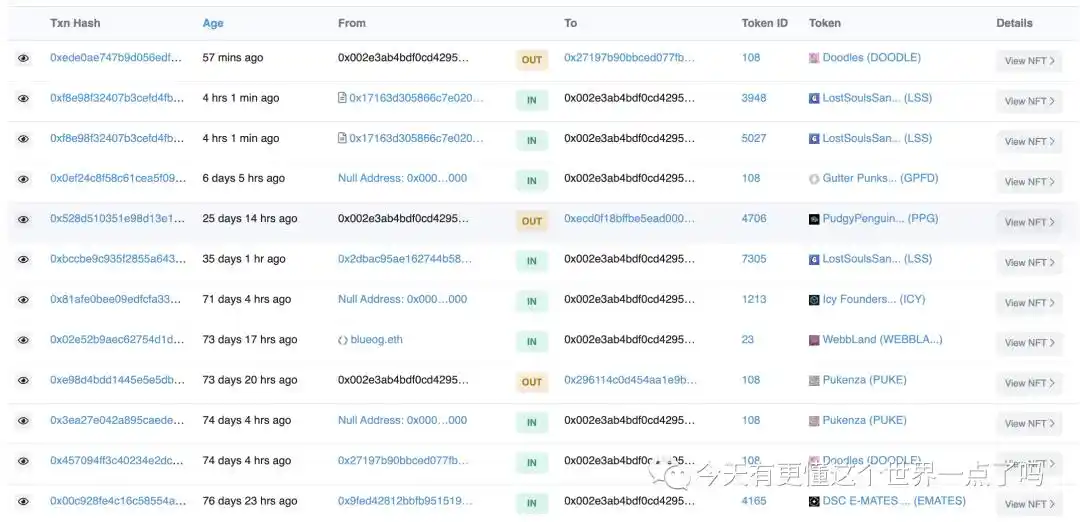
If we look at his transaction records, we can see all his NFT and virtual currency transactions, in which out means selling and in means buying.
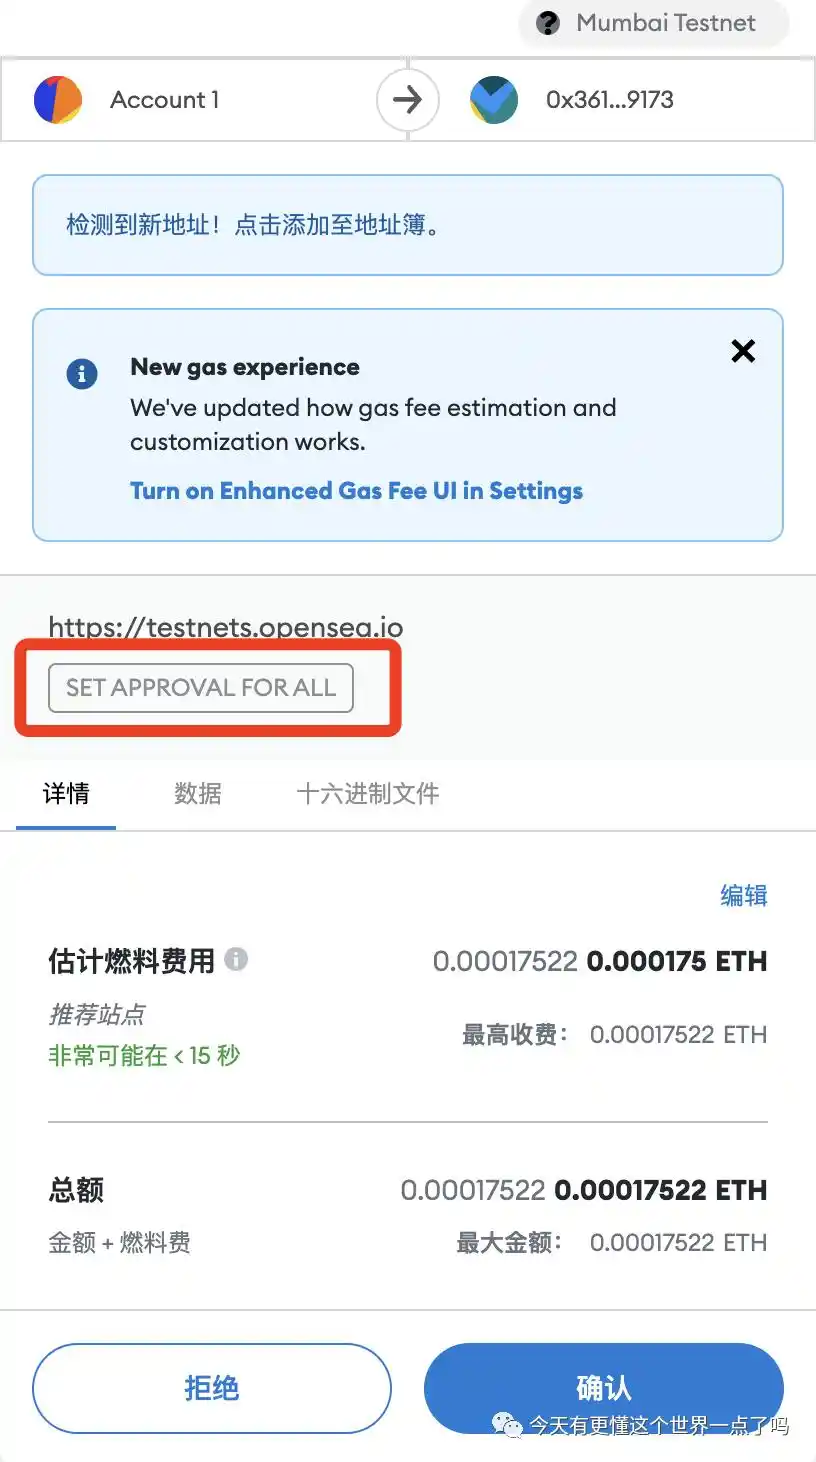
We just analyzed a transaction record for transferring NFT, so let's look at another type called setApproveForAll, which stands for authorized address to transfer your NFT, and that's the interface that we use when Opensea sells its NFT, Grant your NFT transfer rights to Opensea. When someone buys your NFT from Opensea, Opensea has transfer rights to transfer your NFT to the buyer.

As shown in the picture below, when Opensea sells NFT, set Approval for all will be displayed. Therefore, you should be careful if this display appears in an operation on a non-authoritative website, because the other party can transfer your NFT after you agree.
Let's turn to the very first transaction and see what it does.
This is because the function operation is not recognized as a standard function. What is it? Let's look at the gas charge on the far right, which is very high. So it follows that this is the operation of deploying the contract.

Click Txn Hash to get the details and you can see that the note of 0x2B3 is Deployer, he is the contract Deployer of the Doodles project and should be free now...

What happened after the Doodles contract was deployed? The second deal is Set Provenance. To explain this a little bit, in the previous article when you buy NFT, what exactly are you getting? As I mentioned, the presentation layer of each NFT is stored externally, and the project owner has the permission to modify it. Set Provenance stores the data of the presentation layer into the chain by generating hash and storing it only once, so as to ensure that it is impossible to change the data in the future. If the original hash data is changed, the new hasF will be completely different, so that the project side can verify whether the mateData has been modified. Therefore, Doodles can conscientiously use this method to ensure that they do not touch the data.

Then we can see that the Set Base URI is Set, that is, the NFT's mateData metadata is Set, so the metadata is hash first, and then the MATeData URI is saved.

He then uses Set Allow List to Set up the whitelist three times.

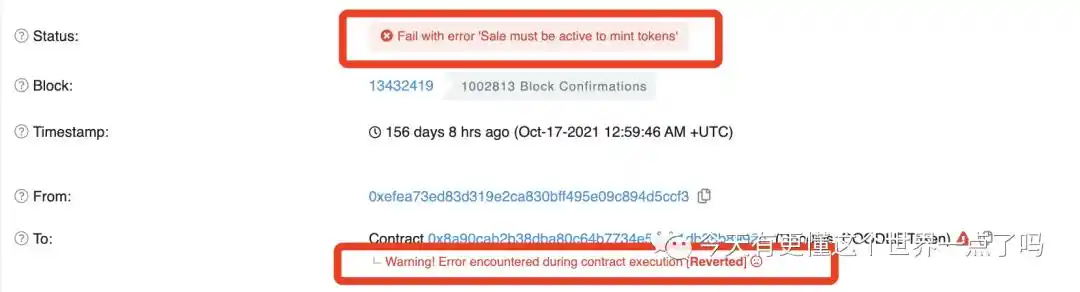
Then several mint operations were created, but none of them succeeded. Why?

We click on the transaction details and see it said. Sale must be opened to mint
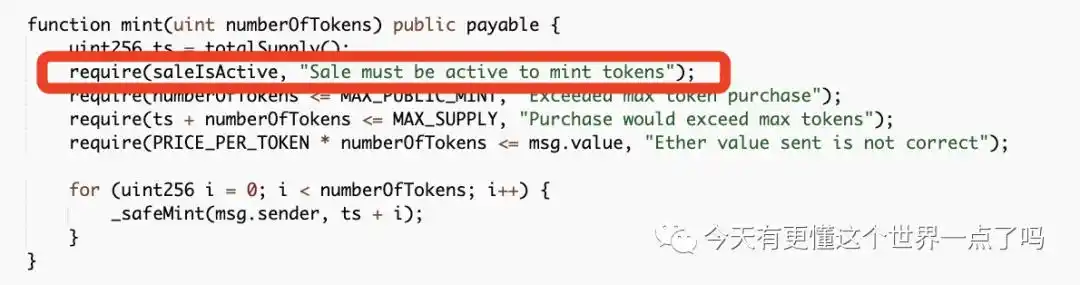
In the mint function, there is a saleIsActive parameter check. If this parameter is false, mint cannot be started. Now do you know why those Mints failed, because the administrator had not started Mint yet, so the transaction was blocked.
Then we scroll all the way up to see that there Is a transaction called Set Is Allow List Active, which means the administrator has enabled Mint.

At this point, Doodles created an endless mint deal and started printing money. .
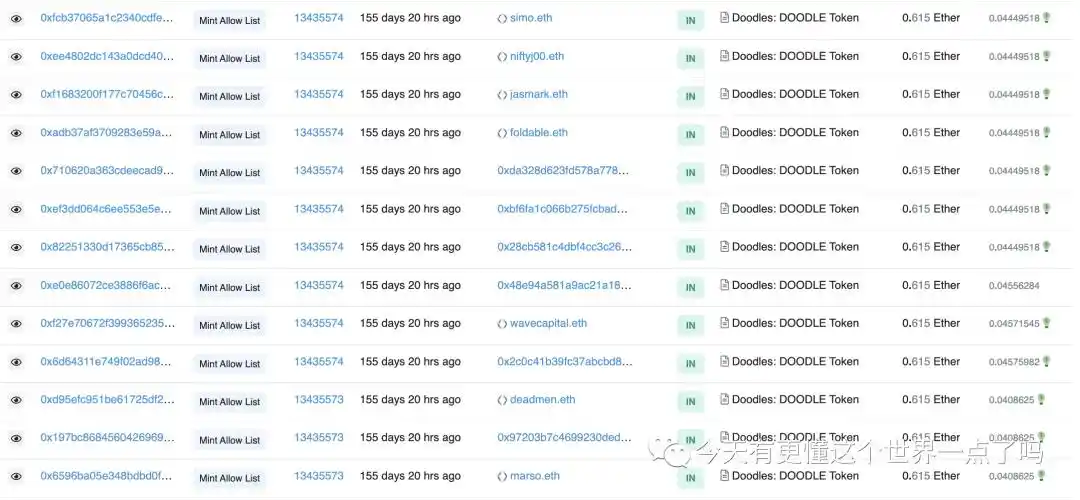
Now that you have learned how to read a project's transaction information, you can read some of your own understanding from it. In fact, it is interesting to look at some of the project's transaction data, especially at the beginning of the data, for example, you can find a lot of project's cheating behavior.
This article is a bit long, and the contract part is not covered, please continue to read patiently.
When we enter the Contract, we can see the Contract code of the project. I will not lead you to read the code here. Later, we will have a chance to show you the Contract code in a separate column.
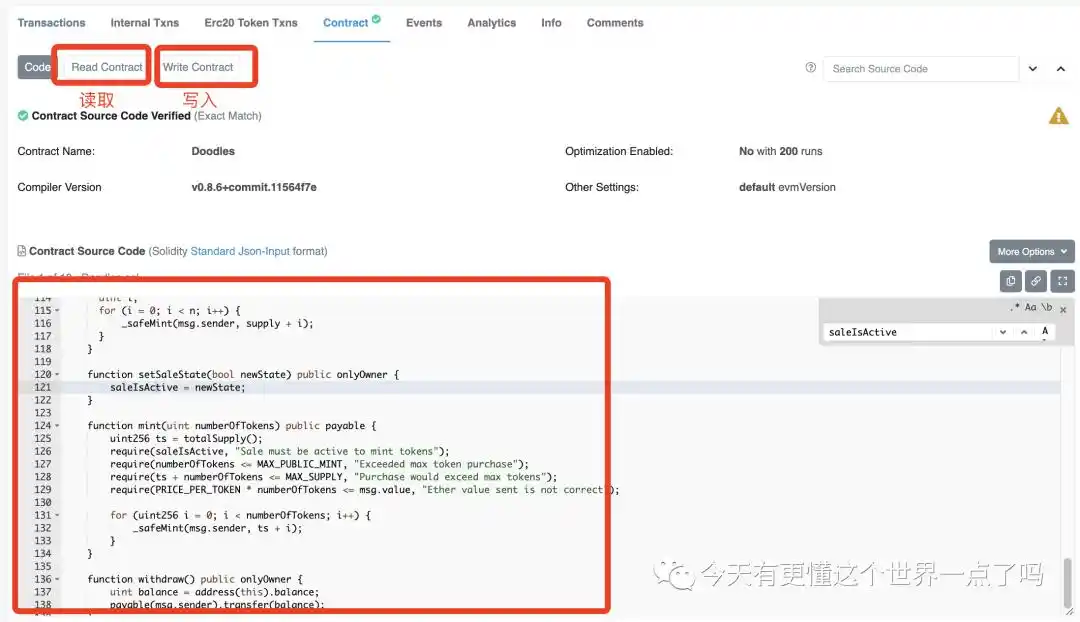
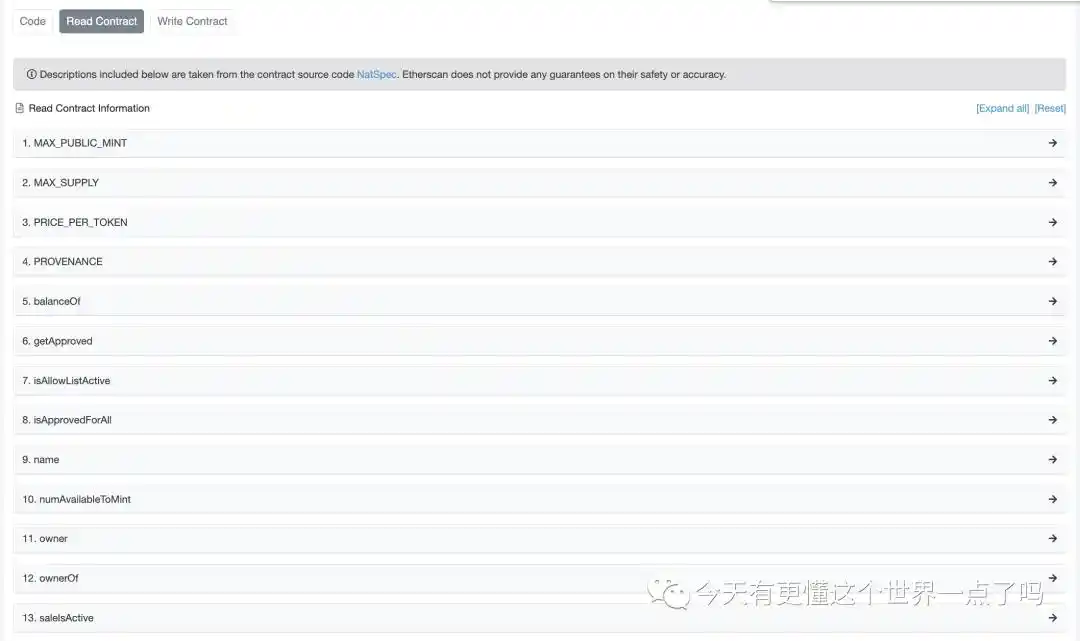
Read Contract refers to Read Contract data, i.e. the Read interface exposed by the Contract code.
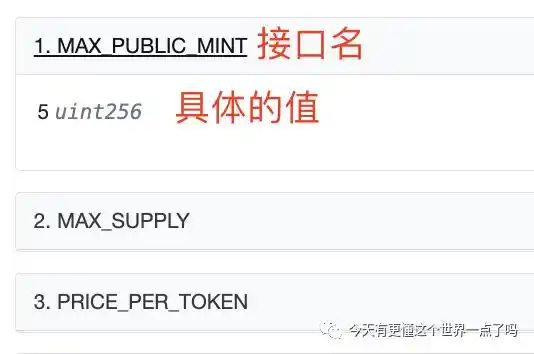
Each interface is divided into an interface name and a specific value. For example, MAX PUBLIC MINT indicates the maximum number of mints a person can use. 5 is shown below.
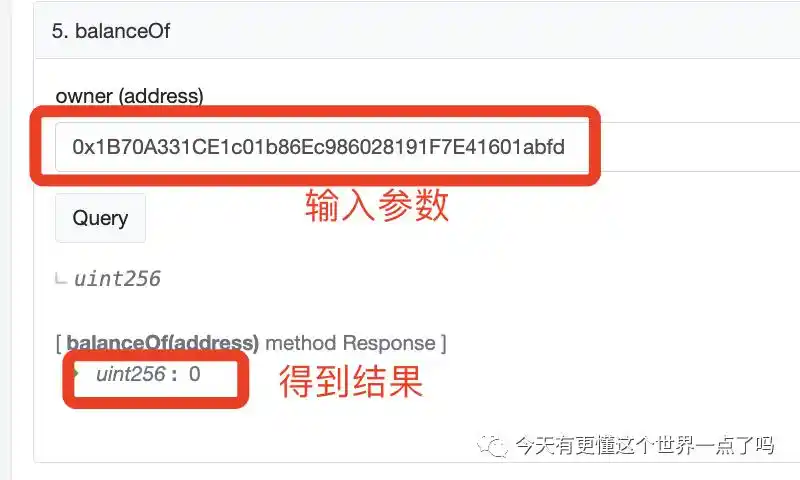
Some interfaces need to write parameters, for example, balanceOf means to query the number of NFT held by a person. We input an address randomly, and the result is 0, that is, no Doodles are held.
The rest is too much to show you, please open the page after you try to point a little, pondering to understand the meaning of it.
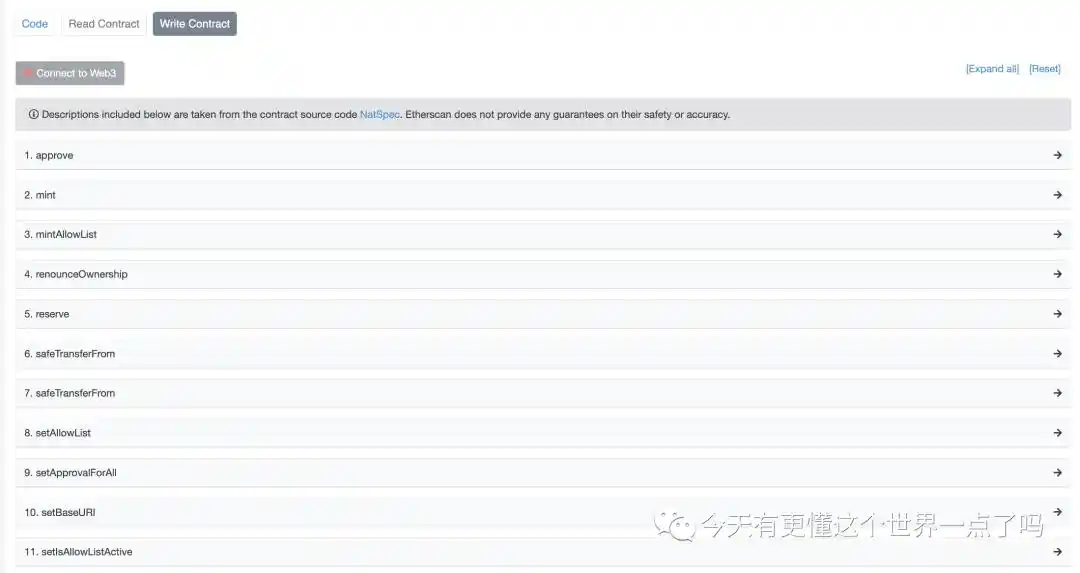
Then we click Write Contract, the interface here is to Write the Contract, that is, to change the Contract data, some of the interfaces need to check the administrator permission can be executed, such as start Mint, set mint price, if you are not the administrator can not execute. Some interfaces, such as Mint, do not require permission verification.
Part of the project code will appear loopholes, some of the interfaces that need permissions forget to set permissions, for example, I heard that a project to transfer the administrator permissions this interface does not set administrator permissions.... So that their contract can be transferred by everyone, this kind of mistake made the whole project cry.
That's it for this article, which is a bit long, but if you see it here you're patient and willing to take the time to learn about Web3, come on!
You can pay attention to my public number "today have a little more understand this world & NBSP;" Check out previous posts for more in-depth discussions, or follow me on Twitter: Jason_chen998 & NBSP;
The original link
Welcome to join the official BlockBeats community:
Telegram Subscription Group: https://t.me/theblockbeats
Telegram Discussion Group: https://t.me/BlockBeats_App
Official Twitter Account: https://twitter.com/BlockBeatsAsia
 Related Articles